
[:en]
Today we will see together how to make mother yeast, or sourdough as it is called by many.
However, we need to mention something; this is a process that will require a lot of patience, time, perseverance and will make you fall in love with bread-making.
To have your mother yeast ready for baking, in fact, you will need a month in which you will have to follow your dough almost daily. But let’s see in detail all the steps…
Ingredients:
- 100 g Manitoba flour
- 50 g mineral water
- 10 g honey
Useful tips:
Flour, if you don’t have Manitoba, you will have to make sure it is high in protein, which means it has at least 13 g. of protein on 100 g. of product. In this case I used 80 g. of Manitoba flour and 20 g. whole wheat flour.
Water must not be from the tap because it may contain chlorine.
Procedure:
Let’s start by dissolving the honey in the water; once melted well, we could proceed adding the flour. We mix everything first in the container, trying to collect all the flour inside, and then start working the dough on the work surface.
Knead it in all directions for a long time, make a ball with the dough and finally make a cross cut on it.

It is now ready to be placed in a glass jar, possibly narrow and high, covered with cling film that you will drill to let the air pass and allow the fermentation gases to come out.
Leave it out of the refrigerator in a mild room for 48 hours.
Once the 48 hours have passed, we will be ready to perform the first “refreshment”; we remove the crust that will have formed on the surface, so we use only the living part of the yeast.
We then weigh 100 g. and dissolve them with 50 g. of water at room temperature…

Now we could add 100 g. of flour and mix everything. The proportions for refreshments will always be the same; the water will be half the weight of the yeast and the flour the same amount.
And now we should only repeat the operation of 2 days before: knead the dough in all directions, make a bal out of it, make a cross cut on its surface and put it in a glass jar for another 48 hours and always keep it in a not too hot place. This time, instead of closing it with cling film, you can use the lid of the container, taking care to leave it slightly open; the yeast still needs some air…

After 48 hours you will have to repeat exactly the same procedure; remove the dried part on the surface of the yeast, weigh 100 g. dissolve it in 50 g. of water, add 100 g. flour, mix and knead the dough well, make a ball out of it, make a cross cut on top and place in the glass jar with the cap open for another 48 hours.
All of these procedures are called “refreshments”. You will have to continue for 3 weeks with refreshments every 48 hours; you will notice that as the days go on, your yeast will acquire structure and consistency.
After 3 weeks, you will go to perform a new refreshment, exactly with the same procedure, but this time allowing only 24 hours to pass before refreshing it again. And you will follow this procedure throughout the week, for a total of 7 refreshments for 7 days.
During the month, I made 17-18 total refreshments, the first 3 weeks every 48 hours, and the last week every 24 hours. Once the last refreshment is performed, you will notice how your yeast is much less sticky, more honeycombed and structured.
This means that you will finally be ready to make bread; then weigh 100 g. of mother yeast to put in the refrigerator to continue to refresh it in the following days exactly with the same procedure.
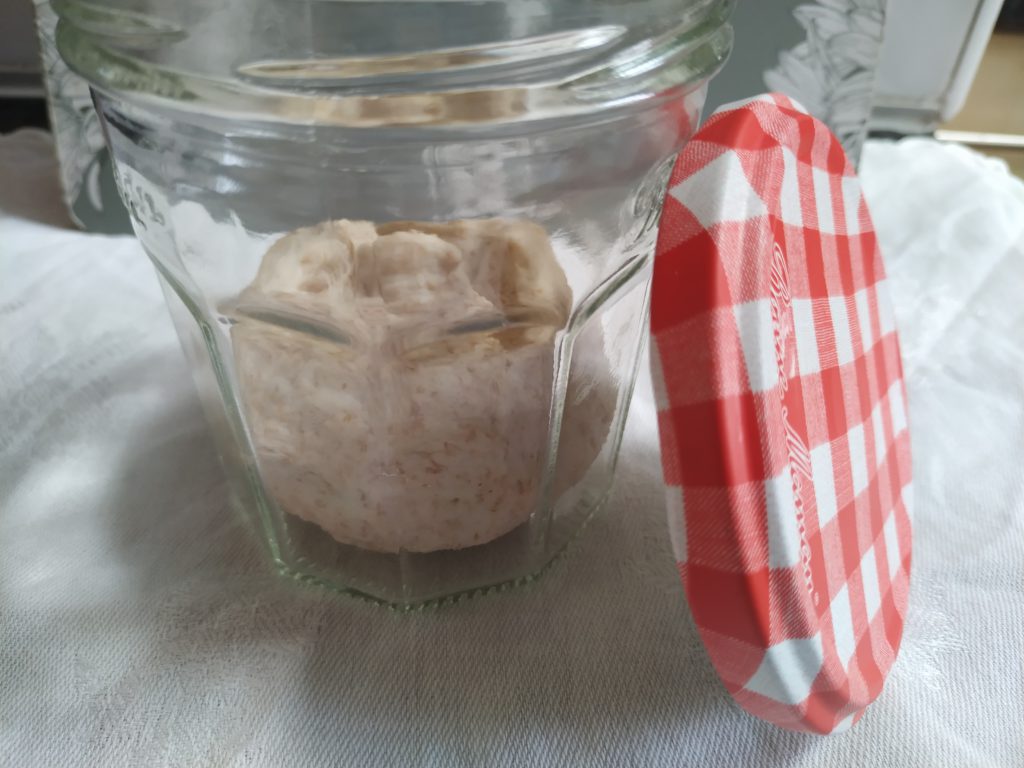
Weigh the rest of your sourdough, let it rise for about 3 hours until it appears as in the photo below…

Now you are ready to create your bread, your focaccia, your pizzas and anything else you want to do!
Share your photos with us and let us know if this recipe has helped you. If you have other doubts or things to ask, leave a message in the comments and we will reply as soon as possible … See you at the next recipe !!!
[:it]Oggi vedremo insieme come realizzare il lievito madre, o pasta madre come da molti è chiamata.
Vogliamo però fare una premessa; questo è un procedimento che richiederà molta pazienza, tempo, costanza e vi farà innamorare della panificazione.
Per avere il vostro lievito madre pronto per panificare, infatti, avrete bisogno di un mese nel quale dovrete seguire e coccolare il vostro impasto quasi giornalmente.
Ma andiamo a vedere piú nel dettaglio tutti i passaggi…
Ingredienti:
- 100 g. farina manitoba
- 50 g. acqua minerale
- 10 g. miele
Consigli utili:
La farina, se non avete la manitoba, dovrete assicurarvi che sia ad alto contenuto proteico, il che significa che abbia almeno 13 g. di proteine su 100 g. di prodotto. Io in questo caso ho usato 80 g. di farina manitoba e 20 g. di farina integrale
L’acqua non deve essere del rubinetto perché potrebbe contenere cloro.
Procedimento:
Cominciamo con lo sciogliere il miele nell’acqua; una volta sciolto bene potremmo procedere aggiungendo la farina. Impastiamo il tutto prima nel contenitore cercando di raccogliere tutta la farina all’interno e poi iniziare a lavorare l’impasto anche sul piano da lavoro.
Lavoratelo a lungo in tutte le direzioni, pirlatelo ed infine eseguite un taglio a croce su di esso.
E’ ora pronto per essere riposto in un vasetto di vetro, possibilmente stretto ed alto, coperto con della pellicola che andrete a forare per far passare l’aria e permettere ai gas della fermentazione di uscire.
Lasciatelo fuori dal frigorifero in una stanza mite per 48 ore.
Una volta trascorse le 48 ore, saremo pronti per eseguire il primo rinfresco; rimuoviamo quindi la crosticina che si sarà formata in superficie così da utilizzare solo la parte viva del lievito.
Pesiamone quindi 100 g. e sciogliamoli con 50 g. di acqua a temperatura ambiente…
Ora potremmo aggiungere 100 g. di farina ed amalgamare il tutto. Le proporzioni per i rinfreschi saranno sempre le stesse; l’acqua sarà la metà del peso del lievito e la farina la stessa quantità.
Ed ora non dovremmo fare altro che ripetere l’operazione di 2 giorni prima: lavorare l’impasto in tutte le direzioni, pirlarlo, eseguire un taglio a croce sulla sua superficie e riporlo in un barattolino di vetro per altre 48 ore e tenerlo sempre in un posto non troppo caldo.
Questa volta invece che chiuderlo con la pellicola, potrete usare il tappo del contenitore, facendo attenzione a lasciarlo leggermente aperto; il lievito ha comunque bisogno di un po’ di aria…
Passate le 48 ore dovrete ripetere esattamente lo stesso procedimento, quindi rimuovere la parte essiccata sulla superficie, pesarne 100 g. scioglierlo in 50 g. di acqua, aggiungere 100 g. di farina, amalgamare e lavorare bene l’impasto, pirlarlo, eseguire un taglio a croce sopra e riporre nel vasetto di vetro con il tappo aperto per altre 48 ore.
L’insieme di questi procedimenti é chiamato appunto rinfresco.
Dovrete proseguire per 3 settimane con un rinfresco ogni 48 ore; noterete che con l’andare avanti dei giorni, il vostro lievito acquisterà struttura e consistenza.
Passate le 3 settimane, andrete ad eseguire un nuovo rinfresco, esattamente con lo stesso procedimento, ma questa volta lasciando passare solo 24 ore prima di rinfrescarlo di nuovo.
E seguirete questo procedimento per tutta la settimana, per un totale di 7 rinfreschi per 7 giorni. Io nell’arco del mese ho effettuato 17-18 rinfreschi totali, le prime 3 settimane ogni 48 ore, e l’ultima settimana ogni 24 ore.
Una volta eseguito l’ultimo rinfresco, noterete come il vostro lievito sia molto meno colloso, più alveolato e strutturato. Questo significa che sarete finalmente pronti per panificare; pesatene quindi 100 g. di lievito madre da riporre nel frigorifero e da continuare a rinfrescare nei giorni successivi esattamente con lo stesso procedimento.
Pesate il resto della vostra pasta madre, lasciatela lievitare per circa 3 ore finché non risulterà come nella foto sottostante…
Ora siete pronti per creare il vostro pane, la vostra focaccia, le vostre pizzette e qualsiasi altra cosa vogliate fare!
Condividete con noi le vostre foto e fateci sapere se questa ricetta vi è stata di aiuto. Se avete altri dubbi o cose da chiedere, lasciate pure un messaggio nei commenti e vi risponderemo al più presto…
Ci vediamo alla prossima ricetta!!!
[:]